 |
 |
We do not have the information to completely repair the missing data, but we can at least repair missing polygons, and perhaps discover and enter the missing parish names.
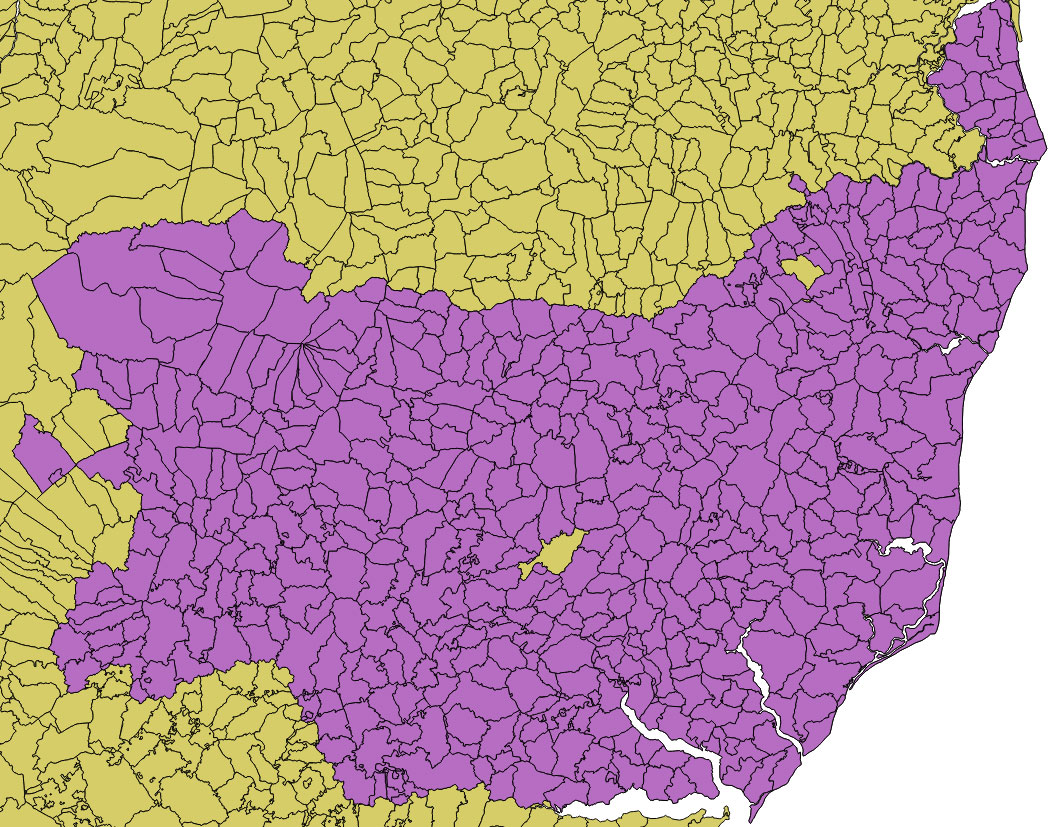
The missing data appears as holes in the county map, as seen in the previous section. If we load the original ESDS layer below our map of Suffolk, the missing polygons appear through the 'holes' in our Suffolk map. These polygons have not been allocated as SUFFOLK in the field GAZ_CNTY. Instead there is no data, as shown by the word NULL where the county name should be in the attribute table.
 |
We now have to edit the original ESDS layer (in yellow) by copying the polygons that show through, and then pasting these into our Suffolk layer (in purple).
So click on the layer name of the ESDS layer (yellow) to make it live, then click on the pencil icon to make it editable. You should see red crosses around the showing through polygons. Then click the 'Select features by area or single click' icon and click 'Select feature(s)' from the drop down menu.
You can now select all the missing polygons. Click on the first one, and remember to CTRL and click on the remainder. They should all turn yellow. Now open the Attribute Table and click the 'Move selection to top' icon. You will see that the selected polygons are reflected by the yellow rows in the table.
Now, in the Attribute Table, click the 'Copy selected rows to clipboard' icon. Half the job is now done, and the table can be closed.
Now open our purple layer by clicking on its name in the Layers window, click on the pencil to make it editable, and click on the 'Paste features ' icon in the main menu at the top of the QGIS main window. We should now have empty polygons filling up the holes in the Suffolk layer.
We can turn off the editing for our yellow layer, and uncheck it in the Layers window to remove it from our map. Zoom in on the empty polygons to have a closer look. By comparing them with the Historical Atlas of Suffolk, we find that the large central polygon is Creeting St Mary, the polygon in the north east is the combined South Elmham All saints and St Nicholas, and a tiny missing parish nearby is South Elmham St James.
Just north west of Creeting St Mary we notice that the parish of Stowmarket is without a name.
Now click on the Purple layer name to make the County Parish layer live. Click on the pencil to make it editable, and then using the select procedure already described, select each of our problem parishes one by one. Open the layer attribute table and click the 'Move selection to top' icon. Move along the row to the column headed 'PAR' and click on the box to amend the NULL entry to the relevant parish name. Also move along to the 'GAZ_CNTY' column and update NULL to SUFFOLK. It is important to also click on the 'Save edits' icon to make the changes permanent.
Continue in this way to update all the missing names feature by feature.
| Go to DIY digital mapping Homepage |
This page created 26th September 2015 Last updated 26th September 2015. | Go to Main Home Page |